
Using Token2 programmable TOTP hardware tokens with Barracuda CloudGen Firewall
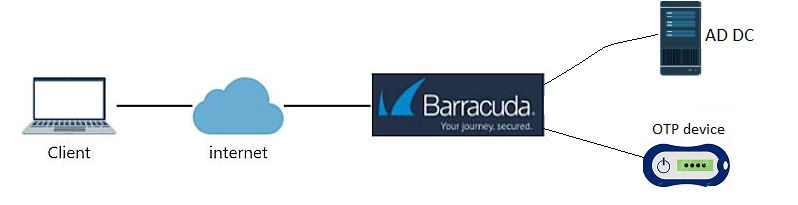
using Microsoft Active Directory as the first factor and Token2 TOTP hardware token as the second. The guide is based on the following components:
• Active Directory deployed on Windows Server 2016 ( IP: 192.168.50.10)
• A Token2 programmable token(the guide below shows C301i as an example)
• Barracuda CloudGen firewall APPLIANCE VF1000 (management interface IP :192.168.50.252)
• An iPhone device with NFC enabled - this is needed for the enrollment only, subsequent logins will only require the hardware token
The steps below are describing the process using iPhone and C301i token,
but please note that the same operation can be done using any of our programmable tokens and supported platforms (i.e. Android or Windows) with minor differences.
Configure Barracuda CloudGen Firewall
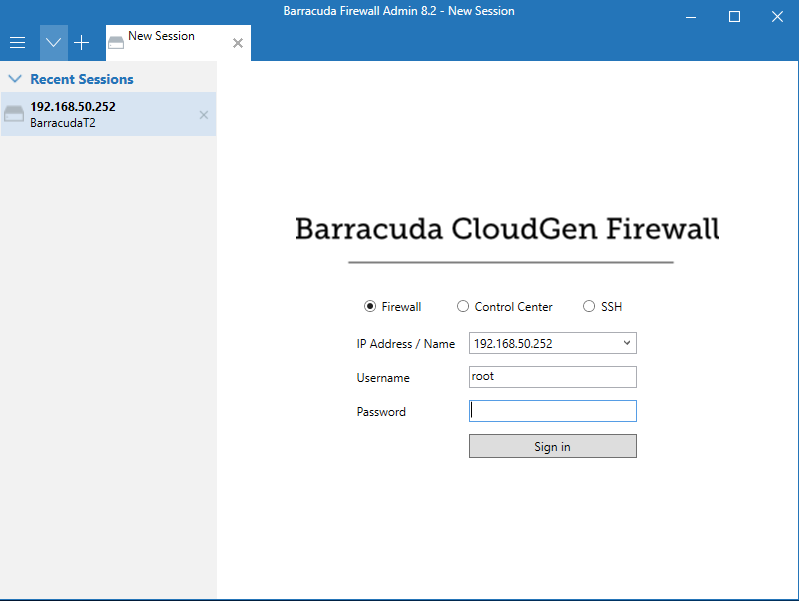
1. Log in to the Barracuda CloudGen firewall with Barracuda NextGen Admin:
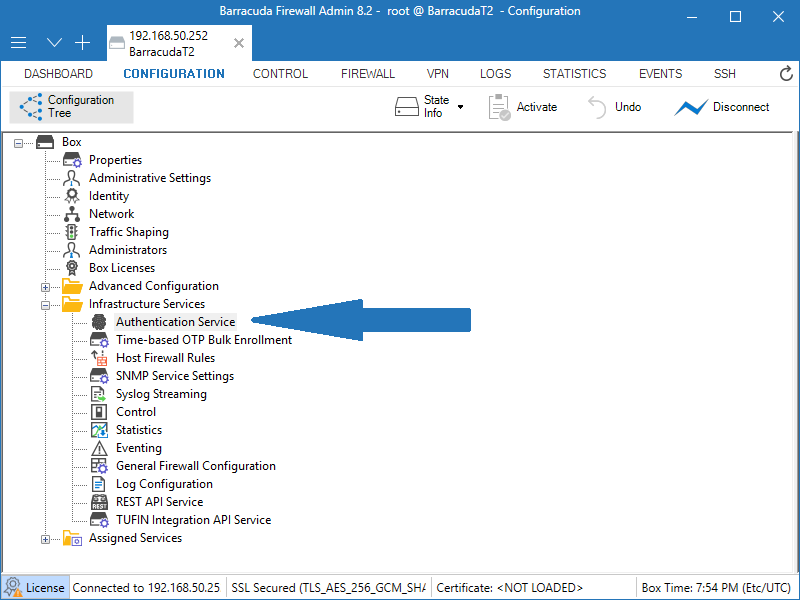
2. Select Configuration > Configuration Tree > Box > Infrastructure Services > Authentication Service
3. From the navigation menu, select MSAD Authentication.
4. Click Lock.
5. From the Configuration Mode section of the navigation menu, select Advanced View .
6. In the MSAD Authentication section , from the Activate Scheme drop-down list , select Yes.
7. From the Method drop-down list, select ACTIVE_DIRECTORY .
8. For Basic , click + to add a DC server.
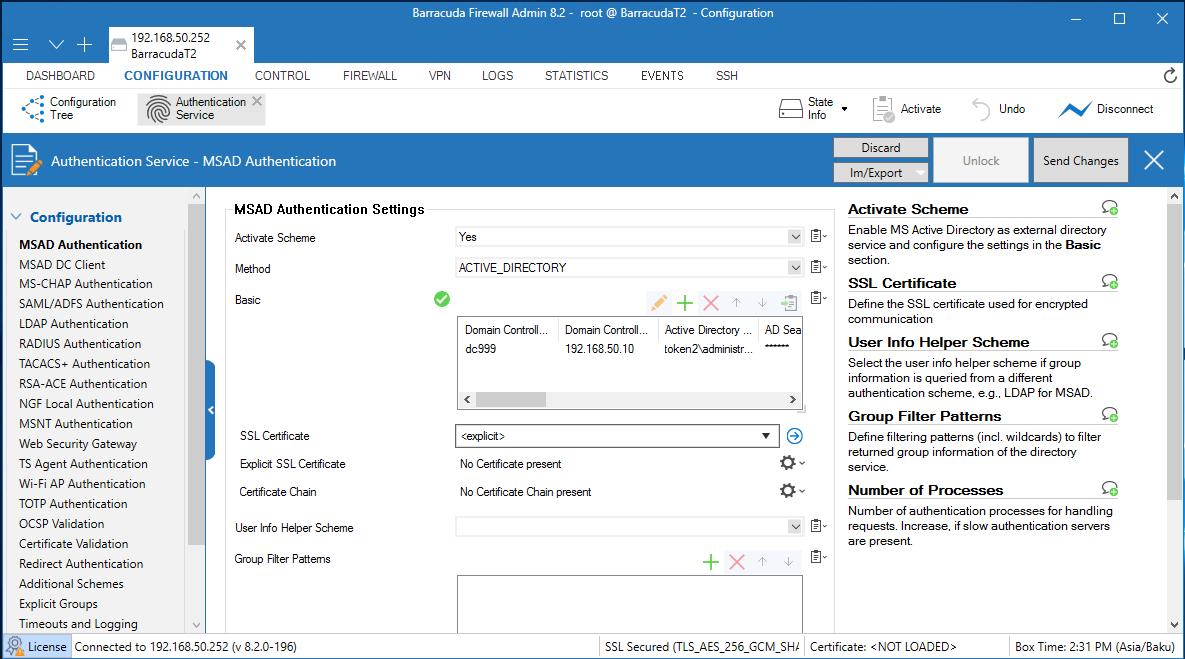
9. In the Domain Controller Name text box, type the name of Domain Controller without domain suffix.
10. In the Domain Controller IP text box, type the IP of your Domain Controller.
11. In the Active Directory Searching User text box, enter any domain user with permission to search in Active Directory(format : DOMAIN\user)
12. In the AD Searching User Password text box type password for this user.
13. In the Base DN text box specify, where to search for user information.
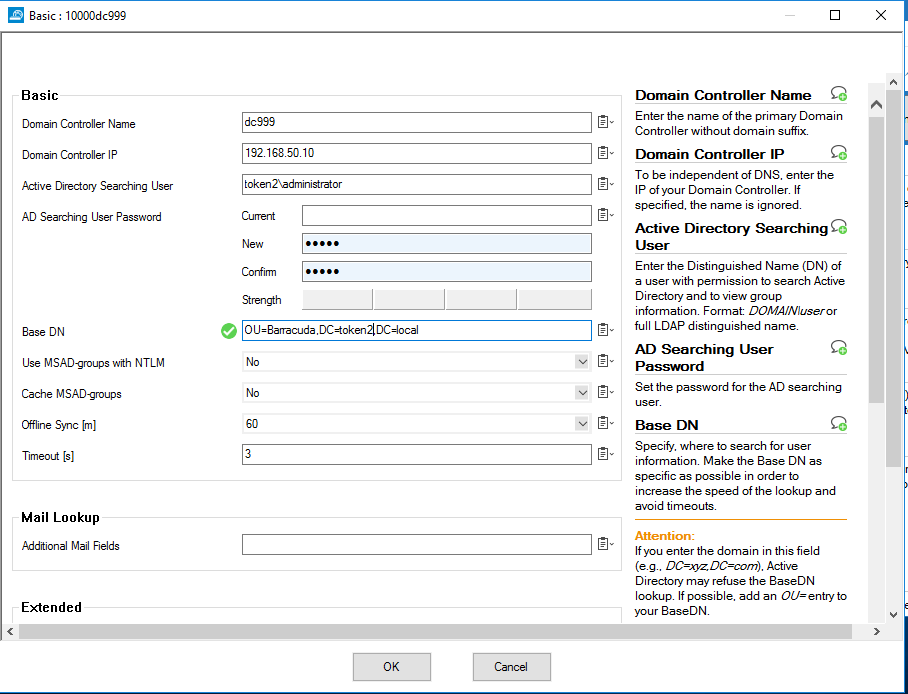
12. Click OK. Leave the default value for other settings.
13. Click Send Changes.
14. Click Activation Pending.
Enable TOTP Authentication.
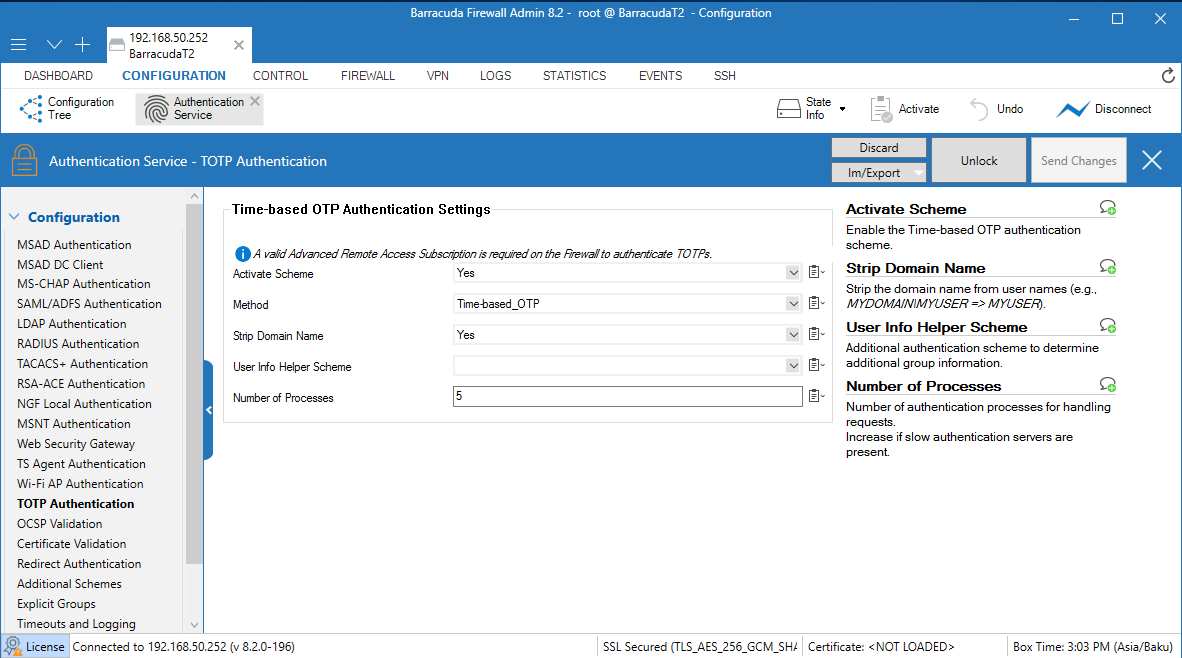
1. From the navigation menu, select TOTP Authentication.2. Click Lock.
3. In the TOTP Authentication section, from the Activate Scheme drop-down list, select Yes.
4. From the Method drop-down list, select Time-based_OTP.
5. Click Send Changes.
6. Click Activation Pending.
Create an SSL VPN Server:
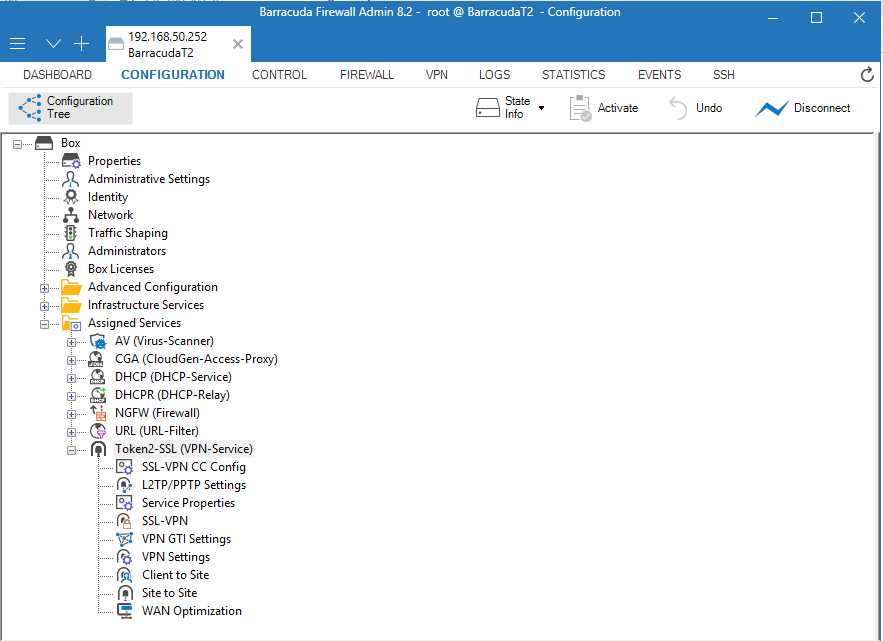
1. Select Configuration > Configuration Tree > Box > Assigned Services.
2. Right-click Assigned Services and select Create Service.
3. From the Enable Service drop-down list, select Yes.
4. Type a Service Name. The service name must be unique and contain more than six characters. You cannot change the service name later.
5. From the Software Module drop-down list, select VPN Service.
6. From the Service Availability drop-down list, select First + Second-IP.
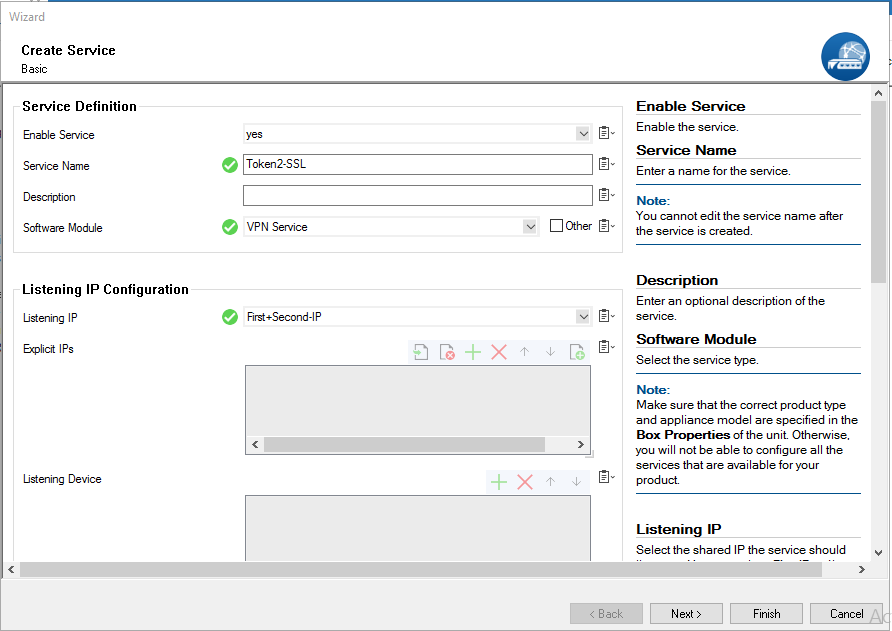
7. Click Next.
8. Leave the default settings on the Statistics and Access Notification configuration pages.
10. Click Finish.
11. Click Activate.
Disable Port 443 for Site-to-Site and Client-to-Site VPN
1. Select Configuration > Configuration Tree > Box > Assigned Services > VPN-Service > VPN Settings.2. Click Lock.
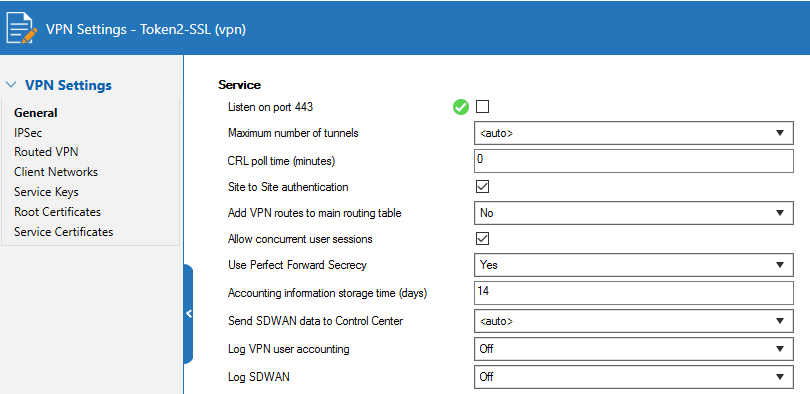
3. Click Click here for Server Settings.
The Server Settings window appears.
4. For Listen on port 443 ,uncheck it.
Configure SSL VPN Server Settings
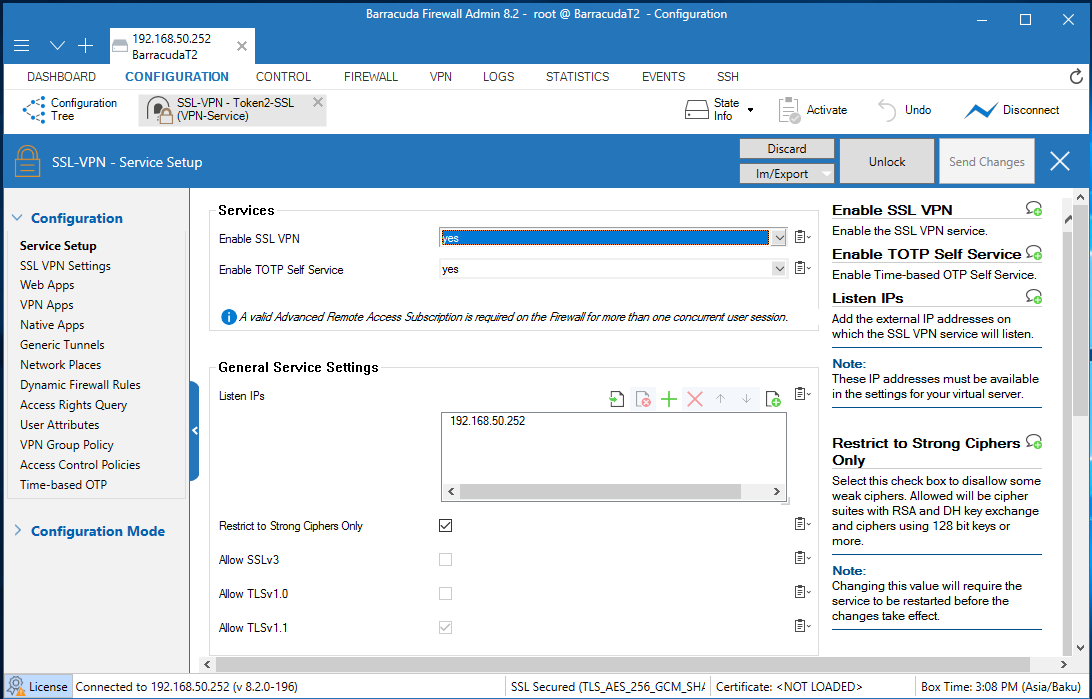
1. Select Configuration > Configuration Tree > Box > Assigned Services > VPN-Service > SSL-VPN.2. From the Enable SSL VPN drop-down list, select Yes.
3. From the Enable TOTP Self Service drop-down list, select Yes.
4. Next to Listen IPs, click +. This is the external IP address that the SSL VPN listens on
(usually the IP address used to connect to the Internet, in this guide we use local ip(192.168.50.252)).
5. Select the Restrict to Strong Ciphers Only check box.
6. From the Identification Type drop-down list, select Generated-Certificate.
7. From the navigation menu, select SSL VPN Settings.
8. From the Identity Scheme drop-down list, select MS Active Directory.

9. Click Send Changes.
10. Click Activate.
11. From the navigation menu, select Access Control Policies.
12. Edit the Default policy.
13. Next to Authentication Schemes, click + and add MS Active Directory, click + and add Time-based OTP;
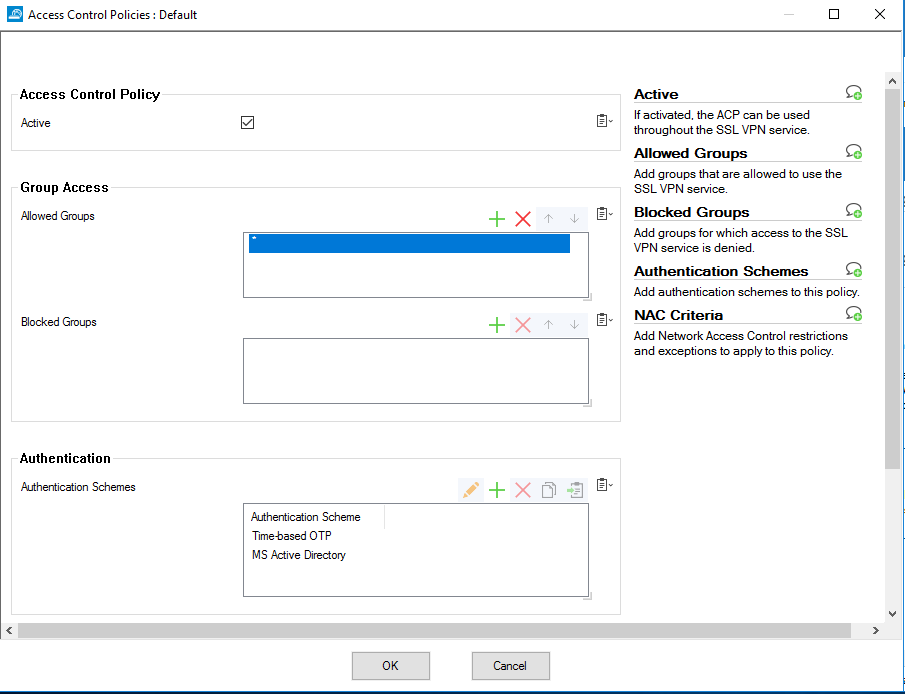
14. Click OK.
15. Click Send Changes.
16. Click Activate.
Install the provisioning tool
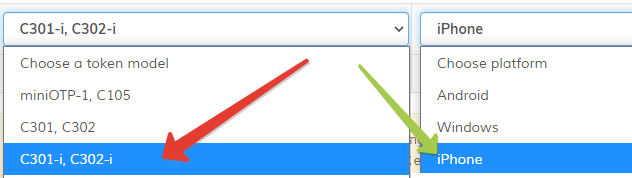
Download and install the supported provisioning app for your device type. Refer to this page to find the correct app for your token and the operating system.
For our example, we selected the C301i as the token model and iPhone as the platform.
Check NFC Connectivity
Next, make sure the app can communicate to the token. To do this, launch the NFC Burner app and click on "get token data" button.
The app will open the NFC prompt. Then, turn the token on (it should show digits or dashes on the LCD) and touch the top of the device (near the speaker).
If the NFC connection is successfully established, you should see the serial number and the system time of the token in the 'Results' textarea.
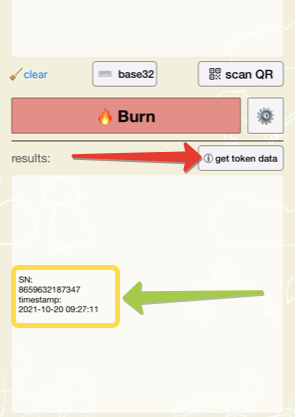
Please note that the timestamp value shown by the app is in UTC timezone and may not match your local time
Self Enrollment
Users can now use the SSL VPN web portal, CudaLaunch, or go to the dedicated TOTP web portal(URL https://(IP of the SSL VPN service)/portal/totp.html) and enroll themselves for TOTP authentication.
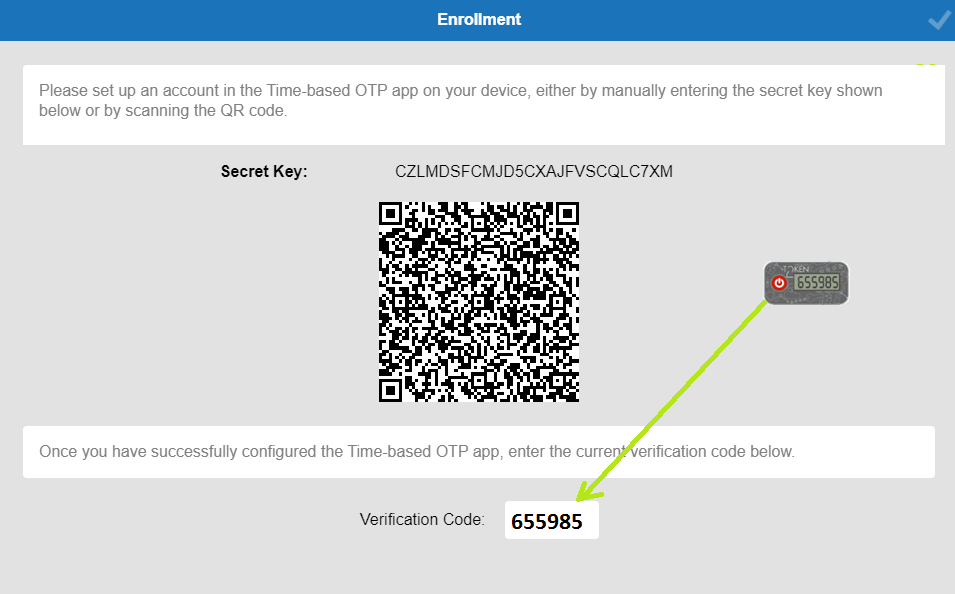
Enter your AD credential and login. After you will see Enrollment page:

• Now, on your iPhone, launch the TOKEN2 NFC Burner app and click on 'scan QR' button.
• Point your iPhone camera to the QR code shown by Barracuda
• Once the QR code is detected by the app, the Seed field should be populated with the hex value of the TOTP profile encoded in the QR image

• Then, click on "Burn" button, turn the token on and touch the top of the device when prompted
• Make sure the results area shows 'seed successfully applied'
• Turn the token off and on again to get the new OTP generated
• In the Enrollment window, enter the 6 digit OTP shown on the token and finish wizard.
Now the account ready to use MFA.
Test the Integration
In this example, we show the one-time password authentication method.1. Log in to the Barracuda CloudGen firewall with Barracuda NextGen Admin.
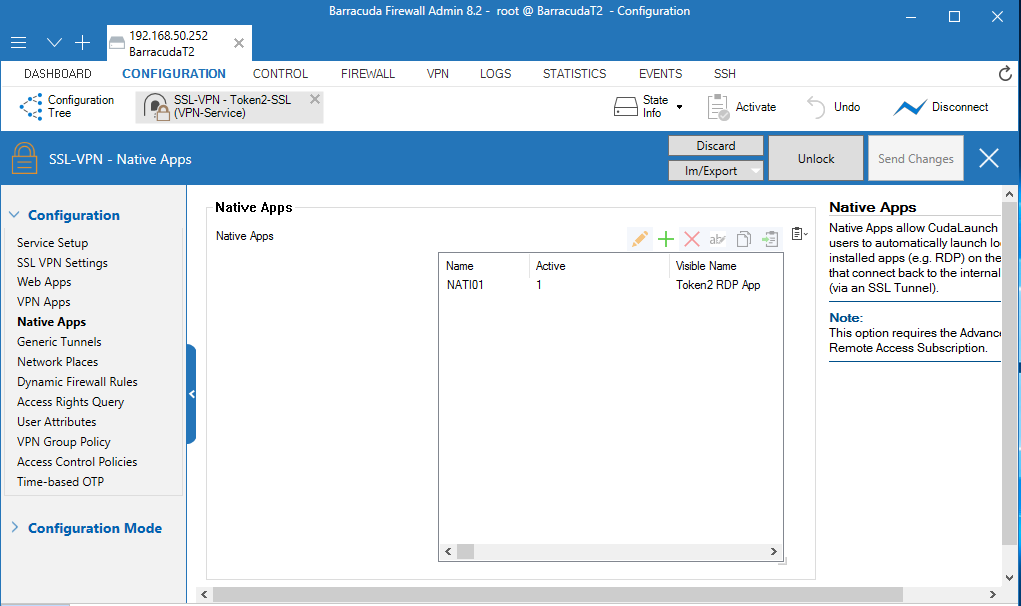
2. Select Configuration > Configuration Tree > Box > Assigned Services > VPN-Service > SSL-VPN > Native Apps.
3. Next to Native Apps, click + and add an RDP App.
4. Run the CudaLaunch client application. You can download this application from the Barracuda NG Download Portal.
5. Type the IP address(192.168.50.252) of the Barracuda CloudGen firewall.
6. Click Connect.
6. In the Server certificate error dialog box, click Yes.
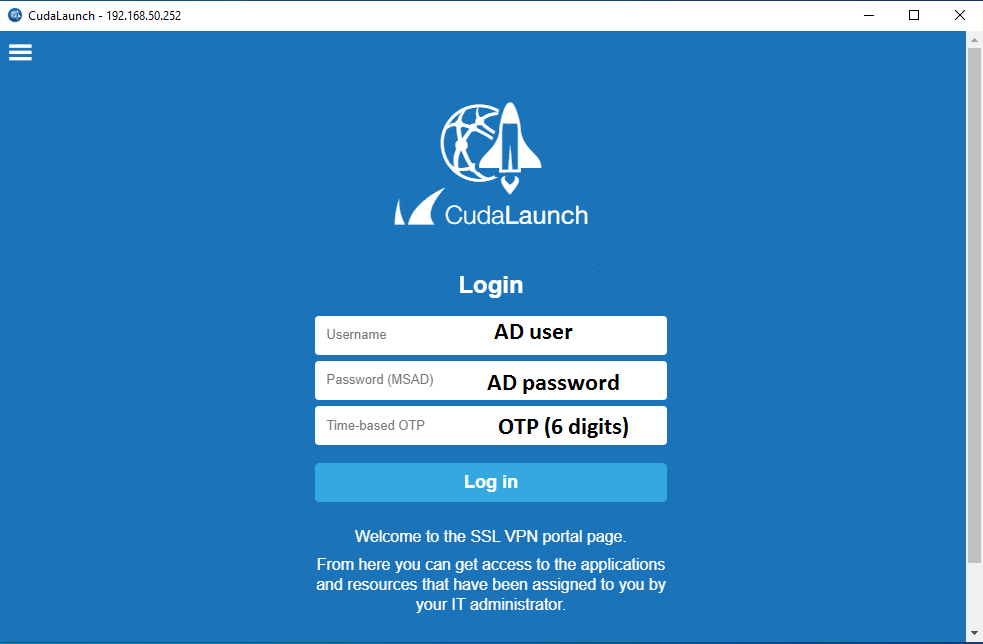
7. In the Username text box, type your AD user name.
8. In the Password(MSAD) text box, type your AD User’s password.
9. In the Time-based OTP text box, type one-time code.
10. Click Log in.
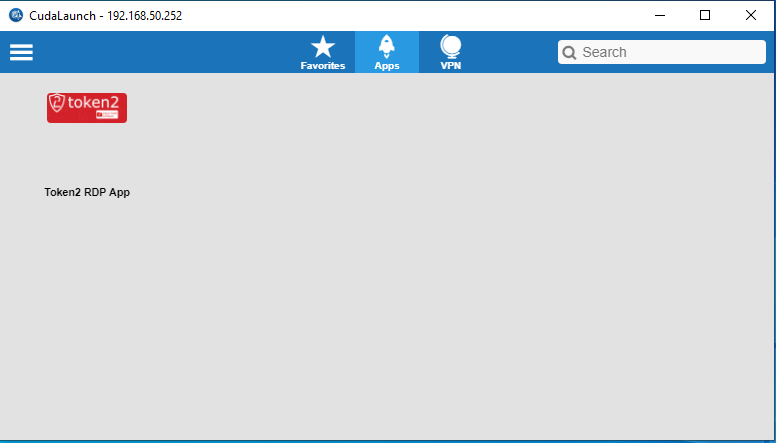
12. Click Token2 RDP App to run this app.
Subscribe to our mailing list
Want to keep up-to-date with the latest Token2 news, projects and events? Join our mailing list!