
Using programmable hardware tokens with Azure AD B2C

On August 16th, 2022, Microsoft announced TOTP-based MFA for Azure AD (Microsoft Entra ID) B2C as generally available. The name used for this authentication method is "OATH software tokens", which is another name for TOTP authentication apps like Google Authenticator or Microsoft Authenticator.
This means that, unfortunately, classic OATH tokens that are currently available with Azure AD (Microsoft Entra ID) (still in preview), cannot be used for Azure AD (Microsoft Entra ID) B2C.
Luckily, you can still benefit from Token2 Programmable tokens as they act as a drop-in replacement for TOTP Apps - the only additional step required in this case is transferring the TOTP secret key (shown as a QR code during the MFA enrollment) onto the hardware token using one of our apps (NFC Burner or USB Config tool, depending on the hardware token model you have).
The guide below will provide basic instructions on how to provision a hardware token for Azure AD (Microsoft Entra ID) B2C MFA.
Prerequisites
- A Token2 programmable token.
- An iPhone or Android device with NFC* - this is needed for the enrollment only, subsequent logins will only require the hardware token
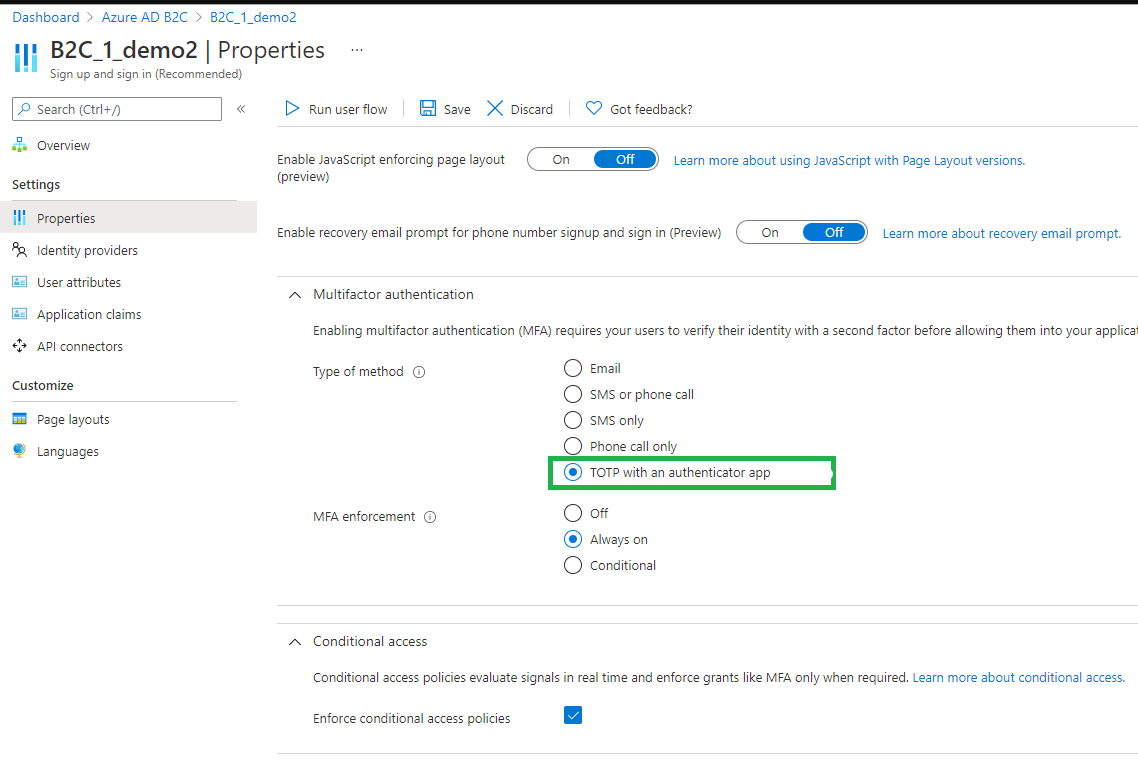
- TOTP Authentication method has to be enabled for the desired user flow, refer to the Microsoft article for exact steps
[* Android and Windows versions are available for all models, but this guide will use the iPhone app as an example. iPhone apps are compatible with "-i" models only. Linux and macOS can be used for some models using a special NFC Writer device]
Provisioning the hardware token
When an Azure AD (Microsoft Entra ID) B2C application enables MFA using the TOTP option, end users need to use an authenticator app to generate TOTP codes. In our case, we will replace the authenticator app with a hardware token, but to transfer the QR code content onto the hardware token, we still need an app that will write the secret onto the token (or, in other words, burn it via NFC, in this example). This can be done by end-users (as long as they have an NFC-enabled device and one of our NFC Burner apps installed), or, alternatively an Azure AD (Microsoft Entra ID) B2C system admin or helpdesk person can help the end-users by following the steps below:
- Download and install the NFC Burner app on your Android or iOS mobile device. The exact app must be chosen from this table by selecting the hardware token model in the left column)
- Open the application requiring you to use TOTP for MFA, for example Contoso webapp, and then sign in or sign up by entering the required information.
- If you're asked to enroll your account by scanning a QR code using an authenticator app, open the NFC Burner app and follow the steps below:
Burning a hardware token
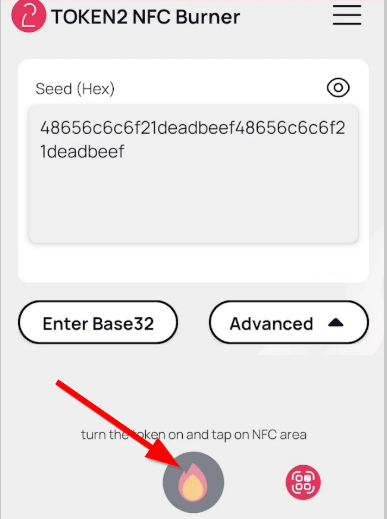
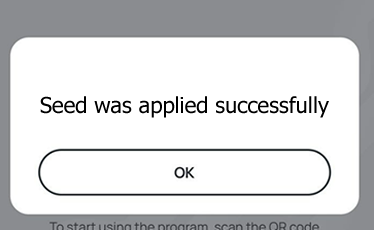
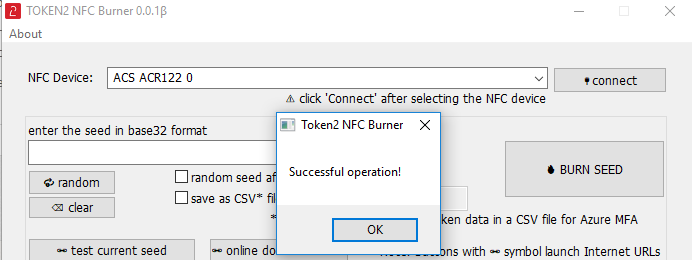
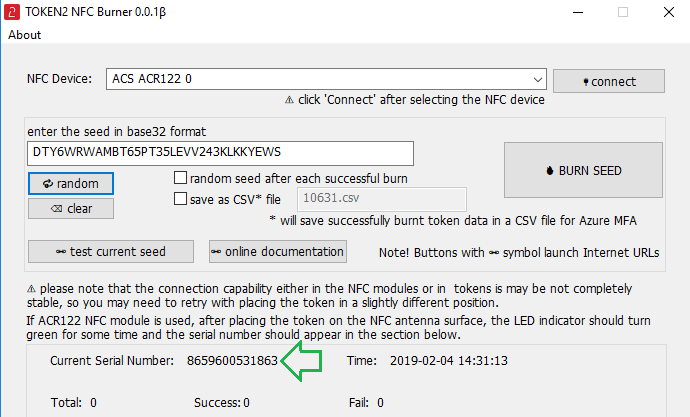
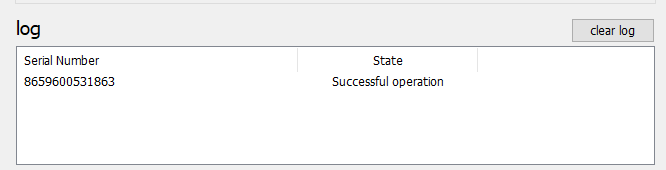
Follow the steps below to perform setting the seed for your token using Windows App. 1. Launch the exe file, then select the NFC device from the drop-down list and click on "Connect". You should see a message box notifying about a successful operation.
2. Enter or paste the seed in base32 format, or use one of the QR scanning methods to populate this field 3. Place the token onto the NFC module and wait for its serial number to appear. 4. Click on "Burn seed" button. A log entry with the serial number and "Successful operation" text will be logged in the log window.

After the token is provisioned successfully, continue with the web application:
- In the application (for example, Contoso webapp), select Continue.
- Turn the hardware token off, then on again (to make sure the newly written secret is used to generate the OTP)
- In Enter your code, enter the code that appears on your hardware token's screen.
- Select Verify.
During subsequent sign-in to the application, type the code that appears on the hardware token, the NFC Burner app nor the device used to configure it will no longer be needed.
Subscribe to our mailing list
Want to keep up-to-date with the latest Token2 news, projects and events? Join our mailing list!